Day 1
GBA Hardware
Day 2
"Hello, World!"
Day 3
Input
Day 4
Backgrounds -
Bitmapped Modes
Day 5
Sprites
Day 6
Backgrounds -
Tile Modes
Day 7
Project 1 -
Tetris
Day 8
Sprites #2 -
Animation
Day 9
Maps
Day 10
Sprites #3 -
Animation #2
Day 11
Backgrounds -
Rotation
Day 12
Sprites #4 -
Mosaic
| HAM Tutorial :: Day 4 :: Backgrounds - Bitmap Modes |
|||
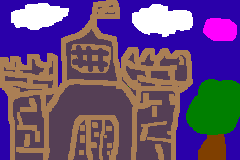
| Today we'll start learning about backgrounds (also known as layers or planes) and background modes. Remember there are six background modes and up to four backgrounds (layered on top of each other) per mode. I am going to start with the bitmap background modes, Mode 3 - 5, because they are the easiest to understand. The first thing you have to know about a background is that it requires a certain format. HAM comes with an easy to use program called gfx2gba that is used to convert BMPs or PCXs to the proper format. NOTE: Please take the time to read the Readme that comes with gfx2gba, it will save you from many headaches! The latest version of the readme can be found here. The image should be 240x160 pixels (or 160x128 if you are using Mode 5). BMPs can be 4, 8, or 15 bits while PCXs should be 8 bits. Feel free to take a peek at the Graphics FAQ if you have questions about formats and palettes, etc. For all of my tutorials I work exclusively with bitmaps. I've created a picture (which is quite ugly) called bg.bmp. It is a 240x160 pixel, 8 bit bitmap. This is important because ham_LoadBitmap() requires this when using Mode 4. Copy bg.bmp to your directory. For these tutorials we'll have a subdirectory gfx for all of the graphics used in our games. Change to that directory and type: gfx2gba -D -fsrc -pbg.pal -t1 bg.bmp This will create two files: bg.pal.c and bg.raw.c Go ahead and take a quick peek at the files. The important thing about bg.pal.c is the name of the array that is created. It should be bg_Palette. The array created in bg.raw.c is bg_Bitmap. You will see these names later in the tutorial program. Speaking of which, let's go ahead and display that background. |
|||
|
|||
| Code Explanation #include "gfx/bg.raw.c" ham_SetBgMode(4); ham_LoadBGPal(...) ham_LoadBitmap(...) ham_FlipBGBuffer() Well, that was a bit much for today. Try creating your own image, convert it with gfx2gba and see if you can display it. |
|||
| Download Code NOTE: You may need to Right-click and choose Save As. HAM Version 2.80 And Higher |
|||
| |